These are the five best knots to know, whether it’s keeping your luggage lashed to the roof rack or preventing your kayak from drifting away. Tim Neville explains the different types of knots and their uses.
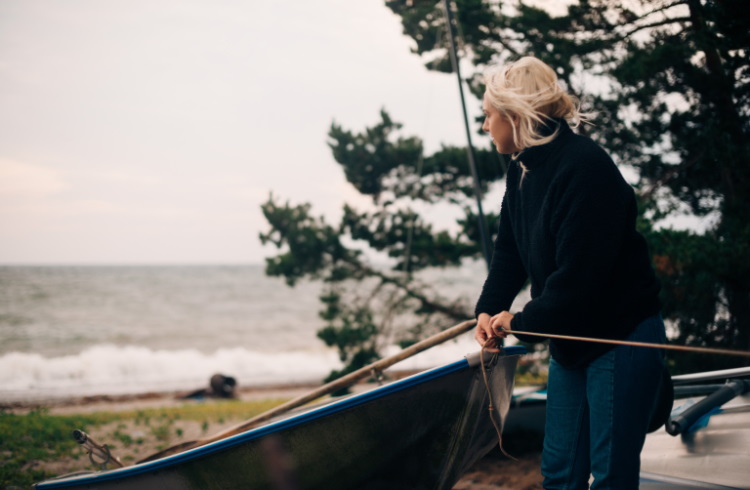 Photo © Getty Images / Maskot
You know how speaking even just a bit of the local language can really save the day at times? Well, there’s another skill that’s even more useful when you really need it. It’s called learning to tie a few simple knots. C’est le truth.
Haven’t you ever been bouncing along in a bus in, say, Peru, wondering if your bag is still lashed to the roof? How nice would it be to secure a tarp over your tent at a rainy music festival? From stringing up a hammock to pulling a dear friend out of, say, a pit of quicksand, knowing the right knot can give you peace of mind and keep you going.
You don’t need to be a Boy Scout or salt-ravaged sailor to master these knots, either. In fact, once you know these, you’ll wonder how you ever got on without them. You’re welcome.
- The language of knots
- How to tie a bowline knot
- Clove hitch / Munter hitch
- How to tie a trucker’s hitch
- Fisherman's knot / Double surgeon’s knot
- How to tie a prusik knot
The language of knots
Knots vs. hitches
Why are some of these called “knots” and others “hitches”? Technicalities, really, but there is a difference. A knot doesn’t need anything other than itself to hold its shape while a hitch only holds its shape if it’s tied around or onto something. Without a stick or ring or even another rope to latch onto, a hitch falls apart.
Other useful terminology
When you tie a knot you’re generally working with two pieces of rope, be they from the same rope or from different ropes. The tag end or working end is the short, loose end of a rope that is often the “active” piece that you’re twisting, pulling, running through, whatever, to form your knot or hitch. The other end is called the standing end. That is generally the longer, more static part of a rope that’s being wrapped, twisted, or otherwise being acted upon by the working end. In some knots, like the fisherman’s knot, you can have multiple working and standing ends.
Not all bends in a rope are the same, either. A bight is like a horseshoe where the rope does not cross over itself. A loop is a closed circle where the pieces do cross over each other. When making loops, be sure to do them exactly as shown. Does the working end go over or under the standing end? A knot works because of the details.
After you’ve tied your knot, you need to dress it. Simply put, fiddle with your knot until the pieces line up properly and everything is nice and snug. Dressing a knot often improves its strength. And for the final step, consider tying a safety knot (aka a stopper knot) on the tag end. These are often simple overhand knots that help keep the tag end from pulling back through the knot.
How to tie a bowline knot
The bowline is perhaps the world's most useful knot, and makes a fixed loop at the end of a rope that can be undone easily. That loop won’t cinch or collapse under weight, which makes it great for tying a rope to, say, the bow of a boat (how it gets its name) or when lashing your bag to a roof rack. It’s also the knot of choice in rescue situations, where you need to lift or lower a person without a harness. Here's how to tie a bowline:
- Thread one end of the rope through or around the object you’d like to fasten the bowline to. If you’re not attaching the knot to anything, just make a bight at one end of the rope. One hand holds the tag end; one hand holds the standing end.
- Without letting go of either end, use your thumb and forefinger on your tag end hand to twist the standing end back toward you (or, more specifically, in the direction in which the tag end points) to create a loop on the standing end. The loop must be inside the bight and the standing end must cross over itself — not under itself — on its journey to becoming the tag end. This is key. This is an easy step to mess up.
- Thread the tag end up through the loop you just made. Be sure to pull through plenty of rope to give yourself enough tag for the rest of the knot.
- Wrap the tag end behind the standing end.
- Thread the tag end back down through the loop.
- Dress the knot by pulling it tight and even. Tie a safety knot in the tag end. If you have done it correctly you’ll have a tidy knot that looks something like a horseshoe with a halo. The tag end will be inside the loop.
Tip: people sometimes remember the steps to this knot this way: “The rabbit comes up out of the hole, goes behind the tree and back down into the hole.” The trick is making sure you’ve made the hole correctly.
Clove hitch / Munter hitch
Clove hitch
The clove hitch can latch onto almost anything – a stick, a rock, a grocery bag, whatever – making it one of the easiest and most versatile “knots” out there. You can even tighten and loosen it without having to undo it. That’s critical in sports such as rock climbing but these days I mostly use a clove hitch for quickly tying up my whitewater raft to shore or to get a cord strung over high branches for hanging food away from critters and bears while camping in the backcountry. The uses for the clove hitch are endless.
For this one, you don’t need to worry about tag ends and standing ends. You can tie it anywhere along the rope.
- Pinch a length of rope between your thumbs and forefingers on each hand about half your shoulder width apart and hold the rope up in front of you so it is parallel to the ground.
- Make a loop of rope by bringing your right hand to your left hand. Be sure to keep your right hand slightly on top of your left hand. Pinch the loop together with your left thumb and left forefinger to hold the loop in your left hand.
- Slide your right hand back to about the same length as you did before and make another loop of rope the exact same way – right hand on top of left hand – but this time pinch the second loop closed with your right thumb and right forefinger and hold the loop in your right hand. You should have two identical loops, side by side on the rope with very little rope between them.
- Take the right loop, the one you just made, and bring it behind the first loop you made in your left hand. Do not twist it. You should have two loops stacked atop each other.
- Stick whatever you're tying this onto into the negative space created by the two loops. Pull the ends tight to dress the knot. You’re done.
If you’ve done it correctly, you should have two loops with an X below them. You can adjust the length of the rope by moving the hitch either way.
The Munter hitch
This is very similar to a clove hitch but functions more as a “friction knot” that allows you to tighten or loosen a rope in a controlled manner. You can use it to lower heavy objects—including yourself. Old-school climbers used this knot to rappel down cliffs. You can also use it to pull the slack out of a rope to keep it taut. These days, I mostly use a Munter on horizontal forces like when I need to hang a hammock or a tarp or even a clothesline, all of which need a tight line strung between two fixed points.
- Follow steps 1-3 above.
- Instead of passing the second loop behind the first loop, bring the two loops together as if you are closing a book. The loops will “face” each other. You can clip a carabiner through the space created by the two loops. The knot will rotate around the carabiner depending on which end you pull.
This is a very easy hitch to tie around a tree, allowing you to tighten the rope to whatever tension you need. Obviously, you can’t stick an entire tree through the loop so you must form the hitch around the tree. To do that, wrap the rope around a tree to make a loop around it with the tag end passing over the standing end. Pull the rope as tight as you need. Without losing that tension, bring the tag end under the taut standing end and wrap it back around the tree in the opposite direction all the way around the tree until the tag runs back along the standing end. Tie two or three stopper knots along the standing end to maintain the tension.
How to tie a trucker’s hitch
The trucker’s hitch creates a mechanical leverage – a 3-to-1 Z-drag system, if you must – that lets you really crank down hard on a rope to make it very taut. This is my knot of choice when guying out a tent fly in preparation for an approaching storm or especially for lashing objects like a backpack or a canoe to a roof rack when you don’t have straps.
However, the trucker’s is not a great knot for creating tight lines that will then bear a lot of weight, like for hammocks, because it creates too much friction and force and can wear out your rope. You can’t use a trucker’s hitch alone, either, obviously, because the rope needs to be already anchored at one end. Bowlines work great for creating that first anchor point.
- Take the tag end and form a bight around your second anchor point, like a roof rack or a tent stake so that the bight’s open space faces away from you. Pull the slack out of the line but keep it pretty loose.
- Create a loop in the standing end by twisting a piece of the standing line back toward you three times.
- Fold the loop you just created back down onto the standing line that runs between the loop and the second anchor point, and pull a bight of the standing line up through the loop you made with the twists. Dress the knot so that you now have a loop in the standing line. Let’s call this a pulley loop. Where you place this pulley loop takes some practice. You’ll see why in the next few steps.
- Run the tag end of your rope from your second anchor point through the pulley loop, and bring the tag end back toward your second anchor point. You should now see a Z-like pulley system.
- Pulling the tag end tightens the standing line with a lot of force – for every unit of effort you pull, you’ll exert three efforts’ worth on the other end (but not really since friction will eat up a lot of your gains). If you’ve placed your pulley knot too close to your anchor point, you may not be able to pull the standing line as taut as you like. If you’ve placed the pulley knot too close to the load, you may not have enough tag end to thread through your pulley knot.
- To secure the tension, use your thumb and forefinger to pinch the pulley knot where it rubs the tag end. Tie stopper knots against the pulley loop to hold it in place.
- To undo the knot, untie the stopper knots and release the tension. Pull the ends of the pulley loop apart and the loop should come easily undone.
Planning an outdoor adventure? Find out how travel insurance can cover activities, lost or stolen gear, medical emergencies, and more.
Fisherman's knot / Double surgeon’s knot
Fisherman’s knot
A fisherman’s knot can be used to tie opposite ends of the same rope together to make a circle. Compared to the double surgeon's knot (below), the fisherman’s is the better knot to use when joining two long ropes where you don’t want to be pulling through endless yards of working ends like the surgeon’s requires. I used this knot to make simple necklaces from which I could dangle seashells or other charms I found cool a billion years ago. Once a fisherman’s knot is heavily loaded or gets wet and dries it will be next to impossible to undo.
- Lay your two pieces of rope parallel to each other, end to end, so that the tag ends overlap each other and face in opposite directions. Be sure to give yourself plenty of tag.
- Wrap one tag end, say, the right one, around the other rope, making each wrap walk back in the opposite direction, so toward the left in this case. Do this twice and keep them loose. You should have a pigtail-like curly cue wrapped loosely around the other rope.
- Thread the tag end you were just using back through the center of the curly cue you made with the wraps.
- Pull the knot tight and dress it if necessary. You should have one rope knotted around the other rope.
- Repeat the process with the other tag end, the left one in this case, wrapping it back around the other rope toward the right, twice, loosely, creating the curly cue.
- Thread the tag end back through the second curly cue and pull it tight, dressing it if necessary
- Grab the two standing ends on opposite sides of your two knots and pull. The two knots should slide together until they abut one another and can no longer slide.
Double surgeon’s knot
Anytime you need to tie a shorter rope to a longer rope to make it longer still, this is a great knot to use. Both of the ropes need to be similar in diameter and if your “short” rope is still really long – say 10ft / 3 m or more – you’ll want to use a fisherman’s knot instead. Most fisherfolk I know actually use the double surgeon knot more readily than a fisherman’s knot for tying on a few extra feet of fishing line because the double surgeon’s is much easier to do with a very thin line or cord.
- Lay your two pieces of rope or line parallel to each other, end to end, so that the ends overlap each other and point in opposite directions. You may only need a few inches of overlap. You may need a whole foot. It all depends on the thickness of the ropes you’re attaching.
- Grasping both ropes, tie an overhand knot along the overlap by making a loop and pulling the tag end of the long rope and the rest of the short rope through the loop. Do not tighten it.
- Take the same pair of working ends you just used and do it again, bringing both the tag end of the long rope and the rest of the short rope through the loop one more. You should have what looks like a circle, with a pair of ropes twisted around each other forming one half and a pair of ropes not twisted around each other forming the second half.
- Tighten and dress.
How to tie a prusik knot
A prusik is another type of friction knot typically used to grasp other ropes and it works best when the prusik rope is smaller diameter in diameter than the rope it is grasping. A prusik slides freely when unloaded but seizes up under weight to grasp whatever the prusik has been wrapped around. It’s a critical knot in almost any rescue situation but it’s also an ingenious way to hang up camp lights and to reposition or tension tarps. It is especially cool because you can use it in combination with any number of other knots and hitches to create compound systems for complex tasks. You need to know the fisherman’s knot to make a prusik. A carabiner comes in handy, too.
- Take your rope and make a loop out of it by tying a fisherman’s knot at both ends.
- Drape your loop of rope over the second rope and wrap one end of the loop around the rope and back up through the other half of your loop. Don’t pull it tight. This is called a half-hitch.
- Do the same thing again, making a half hitch within a half hitch. To do that, take the same end you were just using, wrap it around the rope again, and pass it back up through your loop.
- You should start to see circles of rope stacked up along the other rope. Make sure each of your wraps is stacked neatly and not crossed or bunched up. You want each wrap to be touching as much of the other rope as possible.
- You can stop here or you may need to make more wraps. A prusik that uses rope that’s much thinner than the standing rope will cinch up with fewer wraps than ropes with equal diameters, which may require many wraps to get enough friction to work. A standing rope that’s thinner than the prusik won’t work.
- Clip a carabiner to the loop in the prusik that dangles below your wraps. You can slide the prusik along the rope freely but as soon as you load the loop, the wraps will seize the rope and grasp it. Release the load and the prusik will move freely again. Ingenious, really.

No Comments