From tripods to filters, professional photographer Mark Edward Harris shares his technical tips to mastering slow shot speeds.
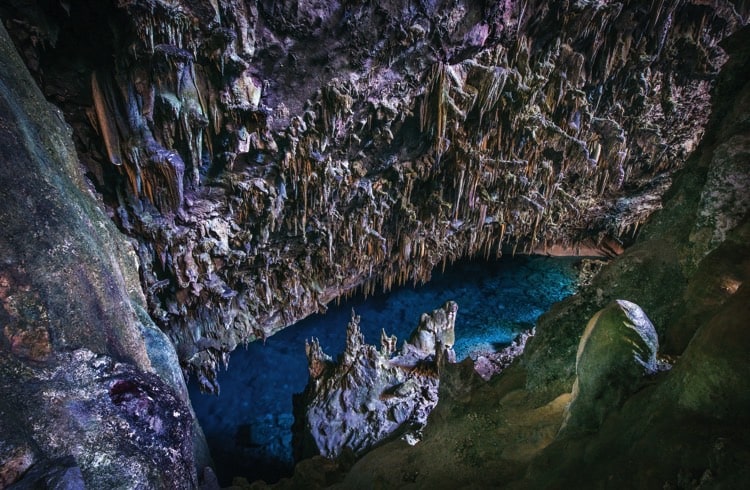 Photo © Mark Edward Harris
In our world of faster and faster modes of transportation, and smartphones with state-of-the-art cameras, it's perhaps more important than ever to stop and smell the roses or at least take pictures of them.
While I’m not an anthophile (a person who loves flowers), there is an endless number of subjects in the natural world for me to focus on. Often these are aspects of nature that are best captured at shutter speeds slower than 1/60th of a second, my traditional cut-off point for handholding a camera. My image of the magnificent Gruta do Lago Azul (Blue Lake Cave) in Bonito, Brazil (pictured above, shot with a Nikon 810 on a Really Right Stuff tripod set to 10 seconds, f/22, ISO 100) serves as an example. The low ISO allowed for a grainless photo while the f/22 aperture on my Nikkor 14-24mm f/2.8 lens gave me an almost limitless depth of field.
Proper tripod use
Just mounting a camera on a tripod doesn’t guarantee a sharp image, especially on a digital single-lens reflex camera (DSLR). When a DSLR’s shutter release is depressed, the mirror that allows you to see through the lens flips up out of the way for the sensor to record the image. This rapid movement causes vibration, so even if you’ve put your camera on a timer or you’re using a cable release, the vibration will still occur at the beginning of your exposure.
To avoid this movement affecting the image, many cameras allow for the mirror to be locked up out of the way in advance. In this mode, the first depression of a cable release will lock up the mirror; the following will trigger the shutter. A good cable release has the second advantage of allowing the shutter to be locked open in the “B” (bulb) position for exposures longer than the camera’s longest-timed exposure.
To make changing from hand-held to tripod a quick transition, I have dedicated quick-release plates on all my camera bodies and my longer lenses. For vertical images, my L-bracket mount keeps the camera on top of the ball head on the tripod rather than fighting gravity with it on the side. When the lens is so big that it outweighs the camera body, it’s better to mount the lens rather than the camera body to the tripod. These longer lenses often have rings on them so they can be rotated from horizontal to vertical positions and everything position in between.
Keep in mind that all tripods are not created equal. A tripod made of carbon fiber will be lighter without giving up quality and therefore is the best type for travel photography. Some tripods have the ability to have a weight hung from below the center column to help add stability, especially useful in windy conditions. Carrying an empty sandbag that can be filled on location can be a great asset.
When using a tripod, make sure to turn off image stabilization/vibration reduction on a lens that has this option before depressing the shutter. The lens can react to its own vibration when it’s on a tripod in what is known as a feedback loop. I also close the viewfinder window on my DSLR to avoid any ambient light pollution coming in from the back of the camera during a long exposure.
Filters for the digital world
Digital photography has greatly reduced, but not eliminated, the need for filters. When I started my career, it was an analog world of daylight and tungsten films. In order to capture the desired results, filters were often needed. Digital has made photography so much easier in terms of attaining proper color temperatures, especially when shooting in RAW. Since all the camera information is retained in that setting, global adjustments are easy to make in post-production.
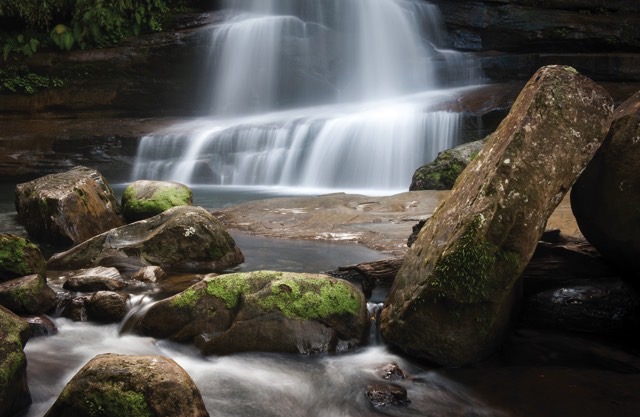
Two types of filters that cannot be replaced by digital are neutral density (ND) and polarizing filters. Polarizers increase saturation and reduce reflections making them extremely useful in shooting scenes with water while an ND filter cuts down the amount of light that passes through it to the sensor without changing the color balance of the scene. This is extremely helpful when a long exposure is required during the day. The painterly results created with a slow exposure of a waterfall on the Okinawan island of Iriomotejima (pictured above) exposed for 2 seconds, f/22, ISO 50 serves as an example. Loupes, such as those made by Hoodman, can be extremely useful for seeing images on an LCD screen when using ND filters or for reviewing images in bright conditions.
Neutral density filters attenuate (reduce) the light by 1 to 10 f-stops depending on its strength. Here are some examples of neutral density filters and their strengths:
ND.3 = 1 stop compensation
ND.6 = 2 stops compensation
ND.9 = 3 stops compensation
ND1.8 = 6 stops compensation
ND3.0 = 10 stops compensation
A variation of the same ND theme is a graduated neutral density filter. These are often rectangular filters that fit into holders so that they can be adjusted to just the right height - typically around the horizon line in a landscape or cityscape – most often to tame a bright sky. Some photographers use HDR in post-production (combining two or more bracketed exposures of the same scene) for this purpose but if you want to capture the scene in camera as I do, a neutral density graduated filter is an excellent solution.
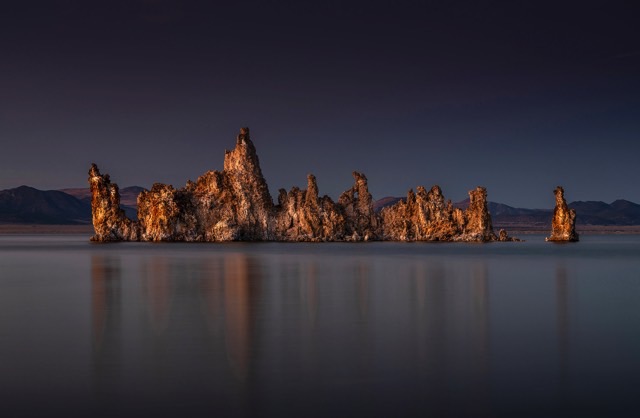
For my image of tufas (porous rocks composed of calcium carbonate deposits) rising out of Northern California’s Mono Lake (pictured above), I combined a Schneider soft edge Graduated Neutral Density 0.9 filter for the sky with a Schneider Neutral Density 4-stop Circular Polarizer which reduced the light for the overall image. The moonlight illuminated the tufas in my Nikon D850’s exposure of 30 seconds, f/22, at ISO 100.
Bring on the night
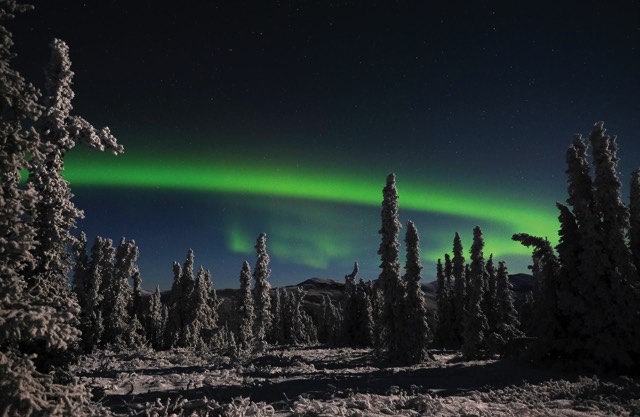
For astrophotography, long exposures are mandatory. My photo of an aurora photographed from Alaska’s Chena Hot Springs (pictured below) was shot with a Fujifilm X-Pro2 with an XF 14mm f/2.8 lens set in manual to 7 seconds, f/2.8, ISO 1600. If I were just shooting for the stars, I could go up to a 20 to 25-second exposure with a wide-angle before seeing any movement in them. An aurora, however, dances around too much for that long of an exposure.
In low-light situations, long exposures reveal details and open up a world the naked eye cannot see, another part of the magic of our shared medium.
Related articles

Simple and flexible travel insurance
You can buy at home or while traveling, and claim online from anywhere in the world. With 150+ adventure activities covered and 24/7 emergency assistance.
Get a quote
No Comments