Finding beautiful landscapes is part of travel, but if you want to remember them forever, creating stunning photos is one way to do it.
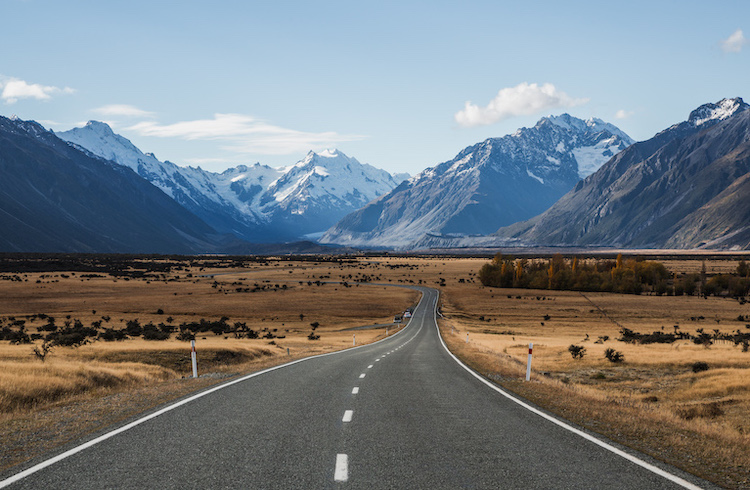 Photo © Getty Images / Matteo Colombo
Landscape photography is a fine art and, unlike other photography genres portraying the beauty of the vast outdoors, it doesn’t give you the opportunity to create your scene or even to manipulate it at your best convenience. When photographing Mother Nature you are, more than ever, a witness of your subject.
However, taking the time to connect with the environment, pushing your creativity, and polishing your skills will allow you to use the power of nature in your favor. These are some tips that are worth keeping in mind to capture the magnificence of outdoor scenes in a compelling way.
1. Take the right gear with you
In contrast to many important decisions that as a photographer you will make in the field right before pressing the shutter, there is one game-changer choice that you should make at home when packing: picking the right gear.
Phones are not the best option for landscape photography instead, a 35mm DSLR or mirrorless camera will not only improve the quality of your images but will also broaden your options to explore exposure possibilities by playing around with as many manual settings as you may need. Combined with a set of high-quality wide lenses, this is a great starting point.
On top of it, you will need to think about key accessories to bump up two fundamentals of landscape photography: contrast and sharpness. Add-ons such as filters, a tripod and a remote shutter are always at hand in the bag of a landscape photographer.
Polarizers and ND filters
To maximize contrast and add drama to your shots you should screw a polarizing filter onto the front of your lens. This filter will improve the colors and overall look of your photo while also helping you reduce invasive and unwanted glare or reflections.
Neutral density filters reduce the light coming in through the lens and allow shooting at wide apertures, high ISO levels, or slow shutter speed. They are super handy to have on bright days.
Tripod and remote shutter
More than ever, these are two must-have accessories in photography. They will both work together to assure zero camera shake no matter the weather conditions or camera settings you are photographing at extra slow shutter speeds, heavy wind days, and uncomfortable shots, they are all blur-proof if you are using a strong tripod in tandem with a shutter release.
2. Get technical
Now that your gear is ready, it’s time to get to the field! You should focus on technical settings to achieve your desired exposure, motion, grain and depth of field.
Exposure
It’s the amount of light in your photo and the result of the combination of three different settings: shutter speed, aperture and ISO. All three of these settings influence the exposure, but while shutter speed also determines motion (the slower shutter speed, the most movement in the shot), aperture establishes depth of field (the wider the aperture, the less depth of field) and ISO defines the grain of your photo (the bigger the ISO value, the more grain). By adjusting these camera settings you will give more or less of an artistic look to your landscape photos.
Motion
When you choose a shutter speed you set the time that the shutter remains open and this creates the dramatic effects of freezing action or blurring motion. For example, you can take two completely different photos of the same waterfall shooting with your camera in the exact same position, set the shutter speed to around 3 seconds and you will recreate the movement of blurred water falling down opposed to the sharp still waterfall that you will have by taking the same photo at 1/1000s.
Depth of field
Landscape photos don’t have to look all the same, shot with wide lenses and great depth of field, with every detail of a never-ending landscape in focus. Sharing your own point of view of a certain subject is what photography is about, so customizing your shots to a variety of focal lengths and depths of field to get original results is also an interesting choice.
All you need to know is that adjusting the aperture to a higher aperture number, for example, f/11, will mean getting more of your photo in focus than if you set it to a low number like f/2. A shallower depth of field can be used in landscape photography to make a certain part of the landscape stand out, for example, a blossomed tree which you want the eye to focus at first. On the other hand, a deeper depth of field will show everything in focus and will invite us to travel around every corner of the place.
Grain
Selecting higher ISO levels adds grain to the film. Many would not go for this option as you lose image quality but others love giving this artistic look to their photos.
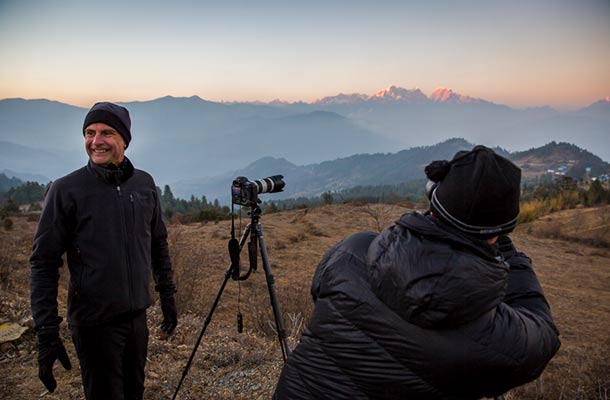
3. Take advantage of the best light
Every photographer knows that light is essential to photography. As a landscape photographer, you should also keep in mind that you won’t be able to artificially illuminate your subject like you might do when taking photos in a studio. When outdoors, the sun is your main light source and to make it your ally rather than your enemy, you will need to plan ahead.
To avoid getting frustrated with harsh shadows and overexposed highlights, take your time for some pre-production research. Get to know the places where you will be taking photos, if possible visit the place at different times of the day and get involved with usual and extraordinary weather conditions—all this will help you skip surprises and shoot when the light is best for your subject.
4. Where to focus?
When watching a photo the eye immediately looks for the point of focus. Therefore, in photography, focusing is another tool to build the story you want to tell. If Wally (Waldo) would have been focused at an f/1.4 aperture he would have not been able to travel the world without being noticed. But he was photographed at a narrower aperture to be told as a lost guy in the middle of multitudes.
That being said, in landscape photography, it is often nice to get a good portion, if not most, of your photo in focus. To do so, shoot at a higher f-stop, which will allow greater depth of field. You can start by trying values between f/7.1 and f/16. You can contrast your results and keep experimenting with higher and lower f-stops values.
What really matters about focusing is getting your subject – whatever your subject is – accurately in focus. Nowadays you can do a lot of fixes in post-production, like correcting light, cloning and stamping different areas of your photo, you can even completely change its colors, but if your main subject is slightly out of focus your photo might be ruined.
5. Push your creativity
If landscape photography was only about visiting beautiful places and photographing the scene in front of you, all photos of a certain destination would look alike. The key here is creativity.
You can look for elements around you to nourish your shot. Look for leading lines that guide the watcher’s eye to your main subject; add blurred foreground elements like rocks, flowers or branches that create an extra layer in front of the background; try panoramic shots or unexpected points of view; bring a character into your frame; play with patterns.
While all these techniques might enrich your photo, pushing your creativity to its limits will make your work unique, it will add a personal stamp and will make it recognizable as yours.
6. Create drama
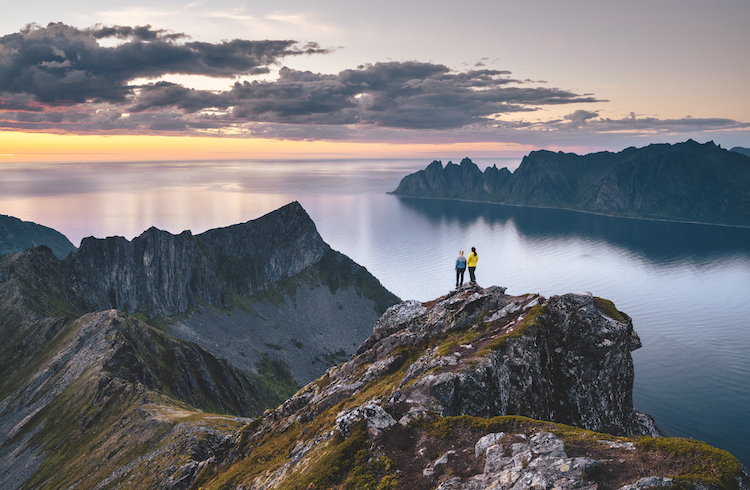
Drama is a great value in photography and if you know how to achieve it you have half of the work done.
A pretty straightforward way to do it is by introducing a human element among nature. It could be people, animals, or human-made objects such as cars or boats. Actually, anything that we can easily recognize its dimensions will work well to show scale and give a dramatic look and feel to your picture.
When adding this kind of element to your landscape photography, make sure you give them some extra power by positioning in an interesting point of your frame and by having them hit by good light.
7. Use water reflections to your advantage
No matter its dimensions, any form of water, from a small pond to a river or lake, can be used in your landscape photos to create mirror effects. To get the best results, try different points of view, and don’t miss going low with your camera as close to the water as you can, setting your camera next to the water source will give your photo a bigger area of reflection.
Not to forget: to create this effect you should be aware that polarizer filters neutralize reflections. Better avoid using them when trying to create this mirror effect.
8. Expect the unpredictable
Photographing outdoors means putting yourself in the hands of nature, and this could be a challenge.
From sudden weather changes and extreme temperature conditions to the encounter of wild animals or an invasion of insects- anything can happen in the wild. Before you hit the road you should plan ahead and get ready for every possible scenario. Think about the weather, clothes, light hours, communication, and even a plan B to spend the night safe on the road if needed.
9. Leave no trace
As landscape photographers, and as travelers too, we should move around and behave according to a priority responsibility: to protect the planet we live in. This means understanding the environment, learning about the place and cultures that we get to know, being responsible about what we share online, and NOT being a disturbance of any kind both to nature and local people.
If we as photographers learn how to take amazing landscape photos while leaving no trace, then we will be double satisfied.
Related articles

Simple and flexible travel insurance
You can buy at home or while traveling, and claim online from anywhere in the world. With 150+ adventure activities covered and 24/7 emergency assistance.
Get a quote
No Comments